Pat Dolan's Website

Monday, March 20, 2006

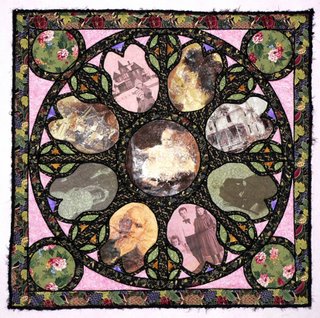
Victorian Rose Window Quilt Completion


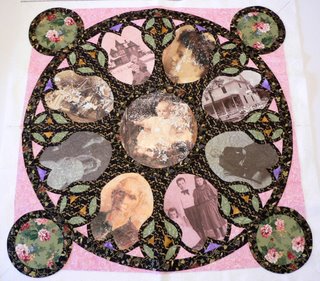
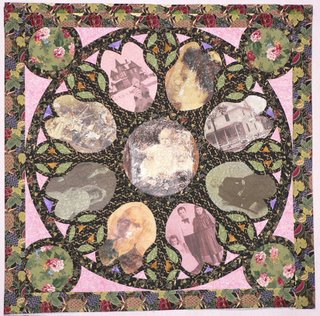
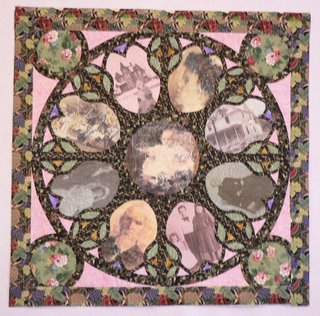
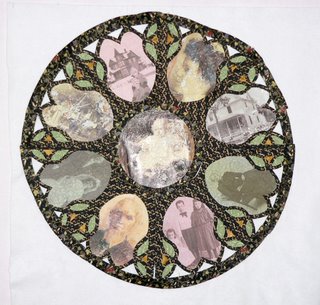
Victorian Rose Window (c) 2006 Pat Dolan 30"x30"
With shoulder surgery scheduled for tomorrow morning, I've been under somewhat of a deadline to complete the FabriQuilt, Inc. booth quilt ahead of time since I don't know exactly when I'll be able to use my sewing machine again. Therefore, it was vital to complete the quilt by today!
And here are the final steps in its completion:
Step 23: Cording
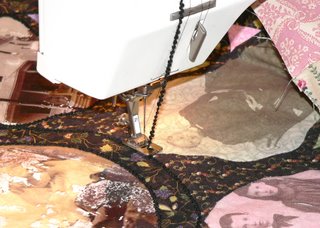
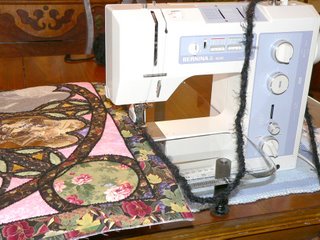
I decided not to do any traditional quilting on this quilt, but to quilt it by applying a cording of thin, curly, black yarn to delineate the "lead" of the stained glass window. Here is a shot of my sewing machine and yarn set-up. The yarn is in a bowl and threads up and around the back of my Bernina 1030 (which has the best setup for cording!), around to the front and down to the cording foot and needle.
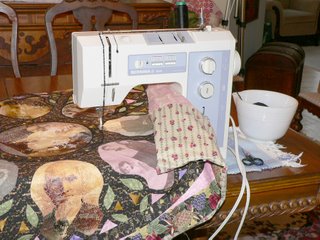
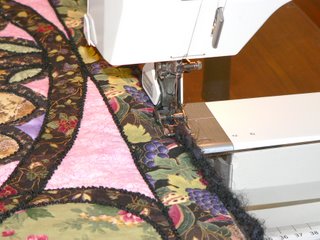
And a close-up of the cording setup.
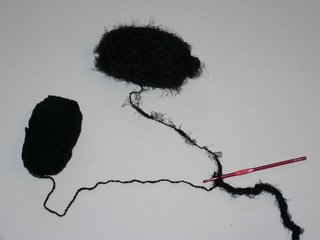
Step 24: Binding/Edging: Once the cording was done, it was time to determine how to finish off the outside edges. I selected two different weights of yarn and crocheted a long chain which was then stitched to the edges of the quilt for a binding.
Step 25: I always label my quilts and have recently decided to print my labels on the computer, then fuse and sew the labels in place on the back of the quilt.
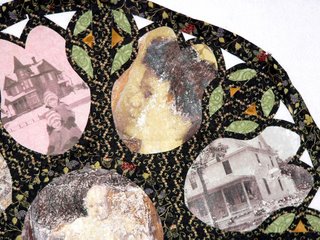
Close-ups:
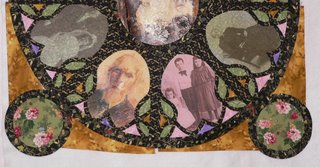
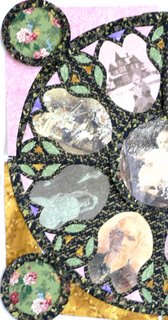
Note the photo-transferred images - I went back in yet again and darkened certain areas that didn't seem to blend well enough into the whole. This time I used watercolor paint directly out of the tube applied with a watercolor brush. The effects satisfy me, at last.


Now it's time to mail the quilt off to the Kansas Art Quilters group. From there it will go to the FabriQuilt, Inc. who will then use it in their booth at the Spring Quilt Market in Minneapolis, MN in early May. Alas, it's for shop owners only, so this quilt will never have much of a public viewing. Still, it was a great challenge and I am satisfied with the completed quilt.

Saturday, March 18, 2006

Happy St. Patrick's Day and Then Some!

Since Blogger was having so many difficulties, I was unable to post these last Friday. But today Blogger seems to be working fine, at last!


Frank bought me some St. Patty's Day carnations - and I so loved the textural details that appeared on the petals having been tinted green.

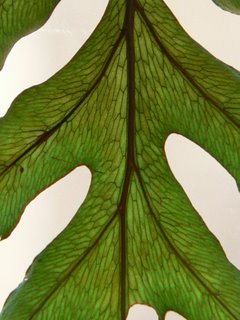
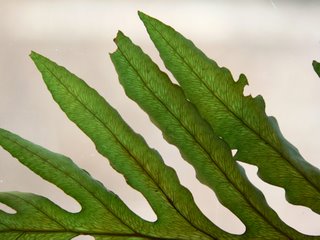
And that brought my attention to a dried fern leaf that I've had taped to the inside of my cabinet door since last summer. Similar textural details, as you can see...


Happy Dancing!!!

On Friday, I received a notice from Karey Patterson Bresenhan - Curator, Journal Quilt Project; Director, International Quilt Festival–Houston and Chicago informing me that my February 2006 Journal Quilt has been selected for publication in her upcoming book entitled "Journal Quilt." Since this journal is one that has not yet been exhibited at the Houston Quilt Festival (but will be next November), I am not allowed to post a photo of it. Suffice it to say it's not my normal style and is somewhat unusual. I am thrilled to have one of my little quilts one of the 300 selected from a field of well over one thousand entries. Two hundred and forty some artists works will be featured in the book with a hope-for publication date of November 2006 - in time for the Houston Quilt Festival.

On Thursday, I met with the Art Director of the Monmouth County Library and subsequently signed a contract to have a one-woman fiber-art show there in March of 2007.

Happy dancing indeed!

Wednesday, March 15, 2006

Rose Window Quilt continued...

Today I experimented with different color schemes for the corners of the quilt.
Step 18: First color scheme - gold...

Step 19: Didn't care much for the gold - too gold, I guess. So I tried pink in the other corner...

Step 20: I liked the pink (egads, what's the world coming to?!), so it was time to cut the pink corner pieces and fuse the whole thing to the batting.

Step 21: After it was fused, I discovered I needed an extra half-inch in the top border and I also realized I needed to tone down some of the white spots in the photos...

Step 22: I applied Derwent watercolor pencil to the top border to blend that extra half inch with the rest (I am limited in my fabric as it was supplied to me by FabriQuilt and what I have on hand is what there is - these are new lines, just coming out). I also used the water color pencils on the photos to darken the white areas where the photo transparency failed to move to the fabric from the transparency film. And yes, I know it would have been easier/smarter to have done that right after the transfer photos were dry... but I didn't. So it was corrected today... prior to beginning the quilting, at least!

Now, of course, it's time to figure out how on earth to quilt this thing... I detest satin stitching, although I suppose that would work very well using black thread over the black fabrics. Boring. Tedious. Nope, not for me. But I do need to tack down all those fused edges somehow or other, won't I? The photos don't really call for quilting, either - quilting might make the figures all jump out of the window, which is something that wouldn't be my choice. So it's time to let it set on the design wall and wait until a solution moves into my consciousness. I'm hoping the ideas will come quickly - I'd like to complete the quilt by Monday, at the latest. I'm scheduled for shoulder surgery on Tuesday... heaven only knows when I'll be able to quilt again, and the quilt is due back in Kansas April 20th.

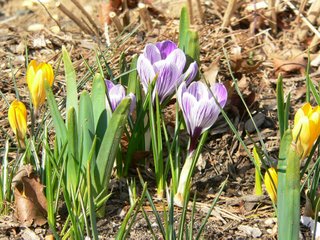
Meanwhile, here's more crocus!

Monday, March 13, 2006

FabriQuilt Process Continues...

After two more days working on this quilt, here's an update:
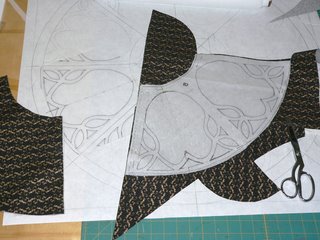
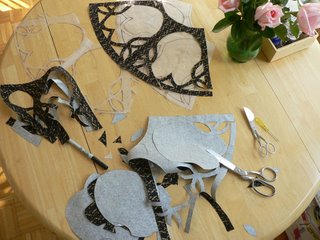
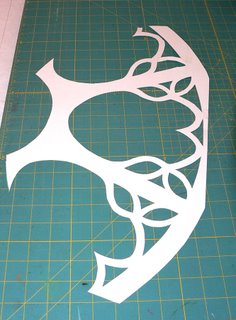
Steps 9 + 10: Creating the rose-window template first on paper, then in plastic, then using it on the Wonder Under paper backing...


Step 11: Cutting out the rose-window "leading"

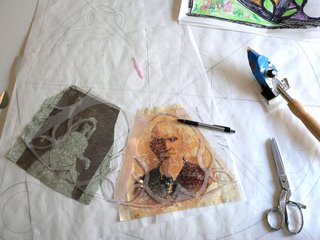
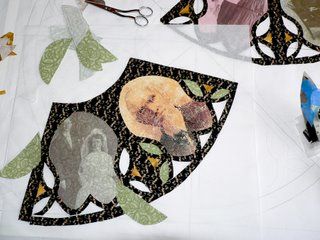
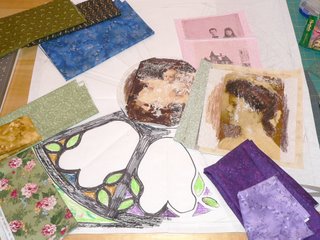
Steps 12 + 13: Planning and trimming the photo-images to fit stained glass slots


Step 14: Fusing the trimmed photo-prints to rose-window-leading (paper backing for Wonder Under is beneath my work so that I can fuse successfully, while leaving Wonder Under unfused where I don't yet need it to be fused.

Step 15: adding yellow triangles

Step 16: adding green leaves

Step 17: present status on design wall

Detail of one quadrant of rose-window

The piece is beginning to come together, although there's quite a bit left to do. Next up, selecting the remaining colors for the rose-window insets. Then, completing the corner motifs

and finally adding an outside black border to encase the window. And, of course, once the top is completed, then comes the quilting!

And since Spring is popping up in my life - the peepers awoke early Saturday morning in the swamp behind the house, a SURE sign of Spring; the robins are back in droves, and my little yellow crocus' are blooming once again - so here's a sample of NJ spring:

Thursday, March 09, 2006

Designing a New Quilt - Step by Step

Here is a step-by-step version of the FabriQuilt art quilt I am designing for their booth at Spring Quilt Market. The requirements are: the theme is "victorian;" it must be made with 100% FabriQuilt Inc. fabric and it must measure 30" square.

I decided to create a memory quilt with vintage photos featuring victorian themes and to use a basic stained-glass, rose-window design as the basis for the quilt.

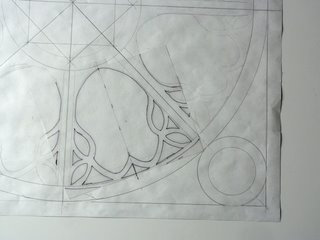
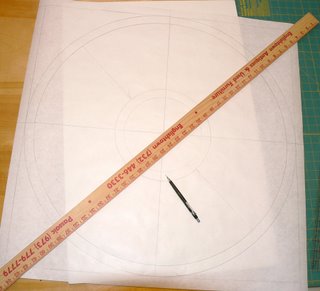
Steps 1 + 2: Designing on paper - measuring out the square and the circle for the rose window basic format. I'm using a 30" wide roll of basic craft paper available at most arts and crafts stores, cut to the appropriate size.


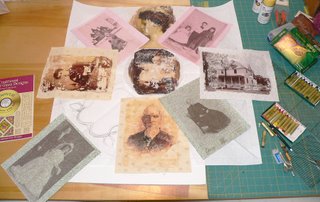
Step 3: Arranging the printed and image-transfered photos in a pleasing design.

Step 4: designing the extra details to create the rose window effect.

Step 5: making a tag-board template of the detailing for the rose window.

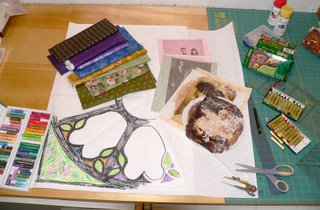
Step 6: coloring of the design based on fabrics available. I'm using Magic Markers and crapas, but anything will do.

Step 7: auditioning and selecting the fabrics for placement in the rose window

Step 8: laying the template on the printed and image-transfered photos and cutting them down to size.


This is a work in progress. I'll keep you posted!

Friday, March 03, 2006

The Glass is ALWAYS Full… a Different Way of Seeing


Tonight over dinner and a bottle of wine, my husband and I discussed all sorts of things from religion to politics to business to art, and more. A good bottle of wine can do that, I suppose, but then we can do that without a bottle of wine – we always could. That’s why we’ve lasted over 40 years – in part, at least.

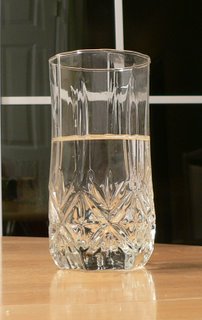
But tonight he surprised me with a new way of seeing an old cliché. There’s always been talk about optimists and pessimists, with optimists seeing the glass half full while pessimists see it as half empty. But Frank says the glass is never, ever empty. And how is that, I wondered. So we started with the story of the science prof who had a bottle full of water on his lab bench. He asked his students if the bottle was full and they all agreed it was. Then the prof added some large stones to the bottle and again asked if the bottle was full. Yes, the students agreed, it was indeed full. The prof then added a large handful of small pebbles, again asking the class if the bottle was full. Yes sir, this time for sure it was very full, they responded. So the prof then pulled out a container of sand and proceeded to add the sand to the bottle, with the same question: is the bottle full? Yes, professor, the bottle is now full to the brim. So, when was the bottle “empty?” Was it still somehow ‘empty’ when it only held water? Or water and stones? Of course not.

Now the story doesn’t say that when the prof added stones, pebbles and sand, that water is automatically displaced and spilled out over the lab bench. So the bottle was really full all those times and when something new was added, but something else had to go.

So the old adage of the glass half full of whatever, has us presuming it is also half empty, right? Yet that is no more true than it was in the case of the professors bottle. The glass may be half full of water, but it’s also half full of air. The glass is never empty – as long as it is a container, it contains something within the confines of itself. Only when it ceases to be able to contain does it cease to hold. And whether or not we LIKE the contents that it holds is what makes all the difference in the world to us.

And so there never really is a glass that is half full or half empty. The glass is always full and it is up to us to decide how we view the contents and how to make the best of what is held therein.

Or so it seems to me…